

editUrl that you load in an iframe — the same embedding pattern as embedded signing.
Templates you create here are what you pass to the signing API. After the user places fields and saves, reuse the templateId to create signature requests (ie let users sign the template).
This walkthrough covers uploading a file, embedding the template editor, placing fields, and regenerating an editor URL when it expires.
Walkthroughs use cURL. The same calls are in the official SDKs.
Prerequisites
- A developer account
- An API key from Settings
- A PDF or Word document under 40MB
- Call the Formable API from your backend only
Supported files
Maximum size: 40MB.
If you later use redlining, the template needs a DOCX source file because redlining edits the underlying document.
Overview
1
Upload a template
Send the file to Formable and receive a
templateId plus an editUrl.2
Embed the editor
Load the
editUrl in an iframe so users place fields in your product.3
Send with the signing API
Pass the
templateId into a signature request (or a redline request) to collect signatures.Server side
1. Upload a template
Send the file asmultipart/form-data with a file part and a filename field. Formable returns the templateId plus a ready-to-use editor URL.
Response
templateId. This is the ID you pass to the signing API when you create a signature request (and when you create redline requests).
signer_roles is optional. Pass it as a JSON string in multipart form data when you want named roles (for example Client, Witness) before opening the editor. You’ll assign those roles to required fields in the editor, then pass matching signers[].role values when creating a signature request.
2. Regenerate an editor URL
Editor URLs expire (by default one day after creation). Mint a fresh one when a user needs to edit the template again.Response
Client side
Embed theeditUrl in an iframe so users place fields without leaving your product.
Listen for editor events
When the user saves in the embedded editor, Formable posts a message to the parent window. Listen for it to close the iframe or advance your UI:
Always check
event.origin before handling a message. These events are for client UX only — they are not a substitute for verifying template state on your backend before sending.
Place fields in the editor
In the embedded editor, use the Field selector to place and configure fields on the document.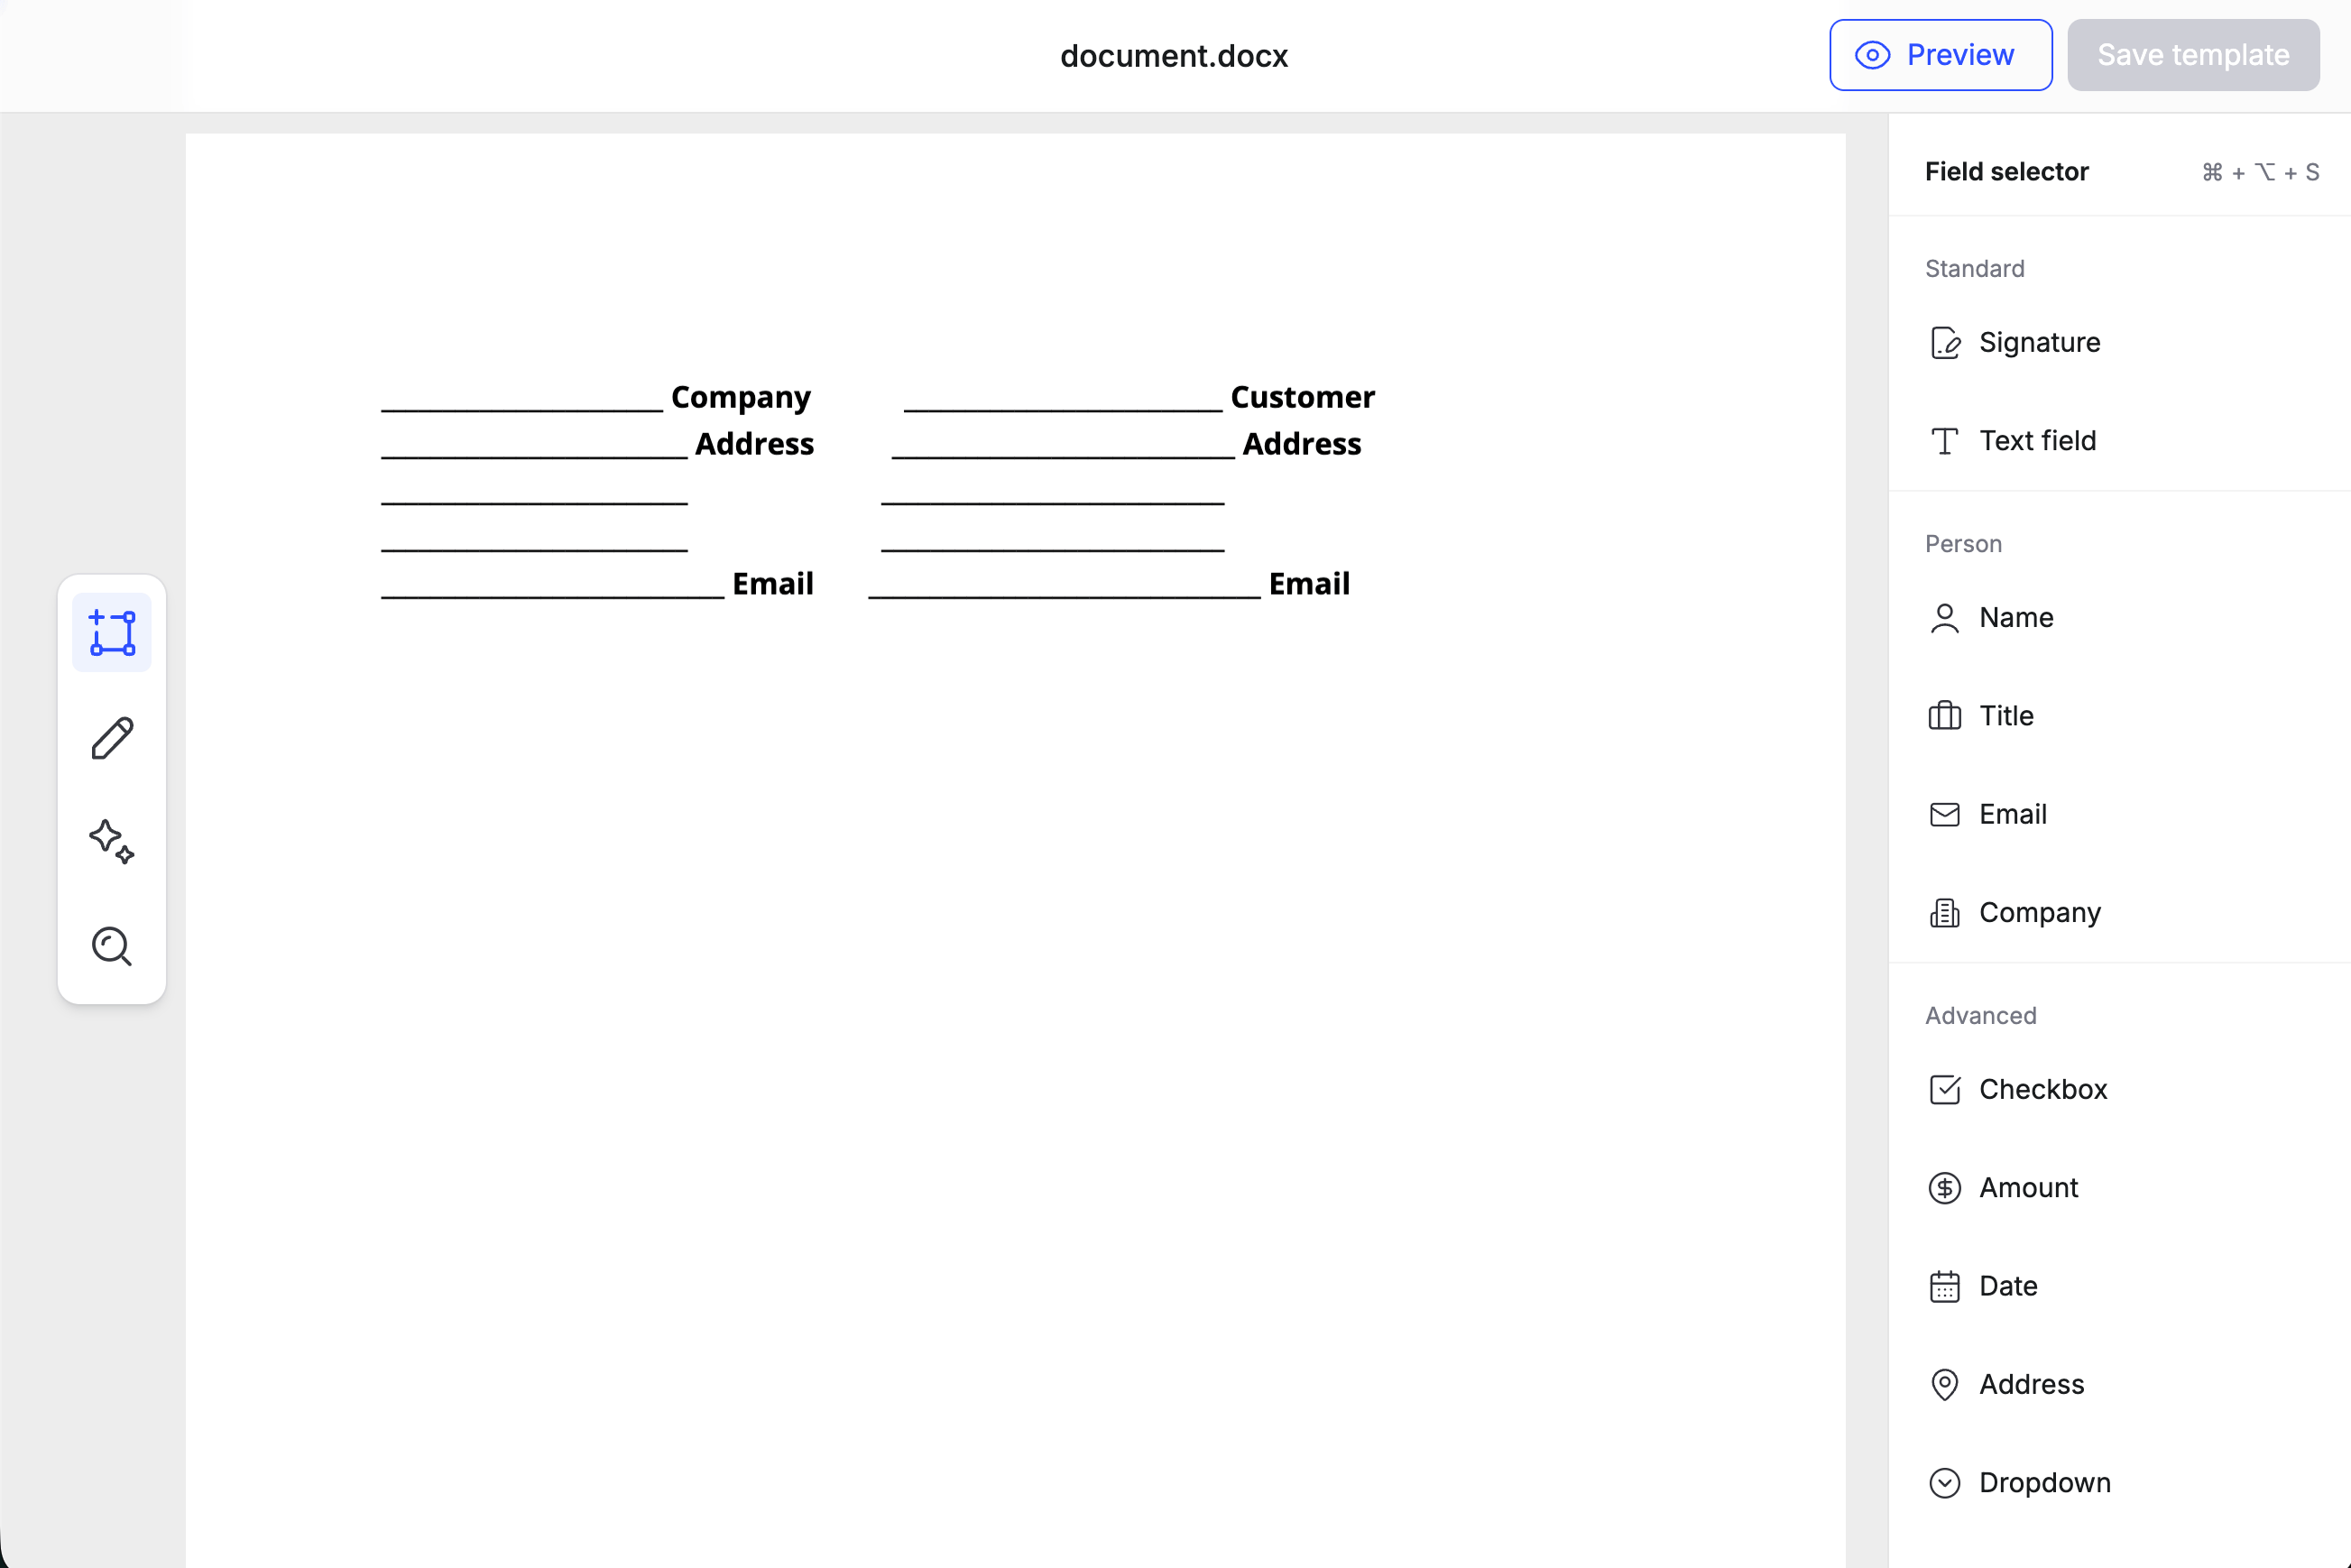
The template editor with the Field selector open. Choose a field type, then place it on the document.
Select a placed field to set whether it’s required, assign a signer role, and copy its Reference ID. Required fields must have a role before you can create a signature request. You can reference field IDs if you decide to prefill fields on a signature request.
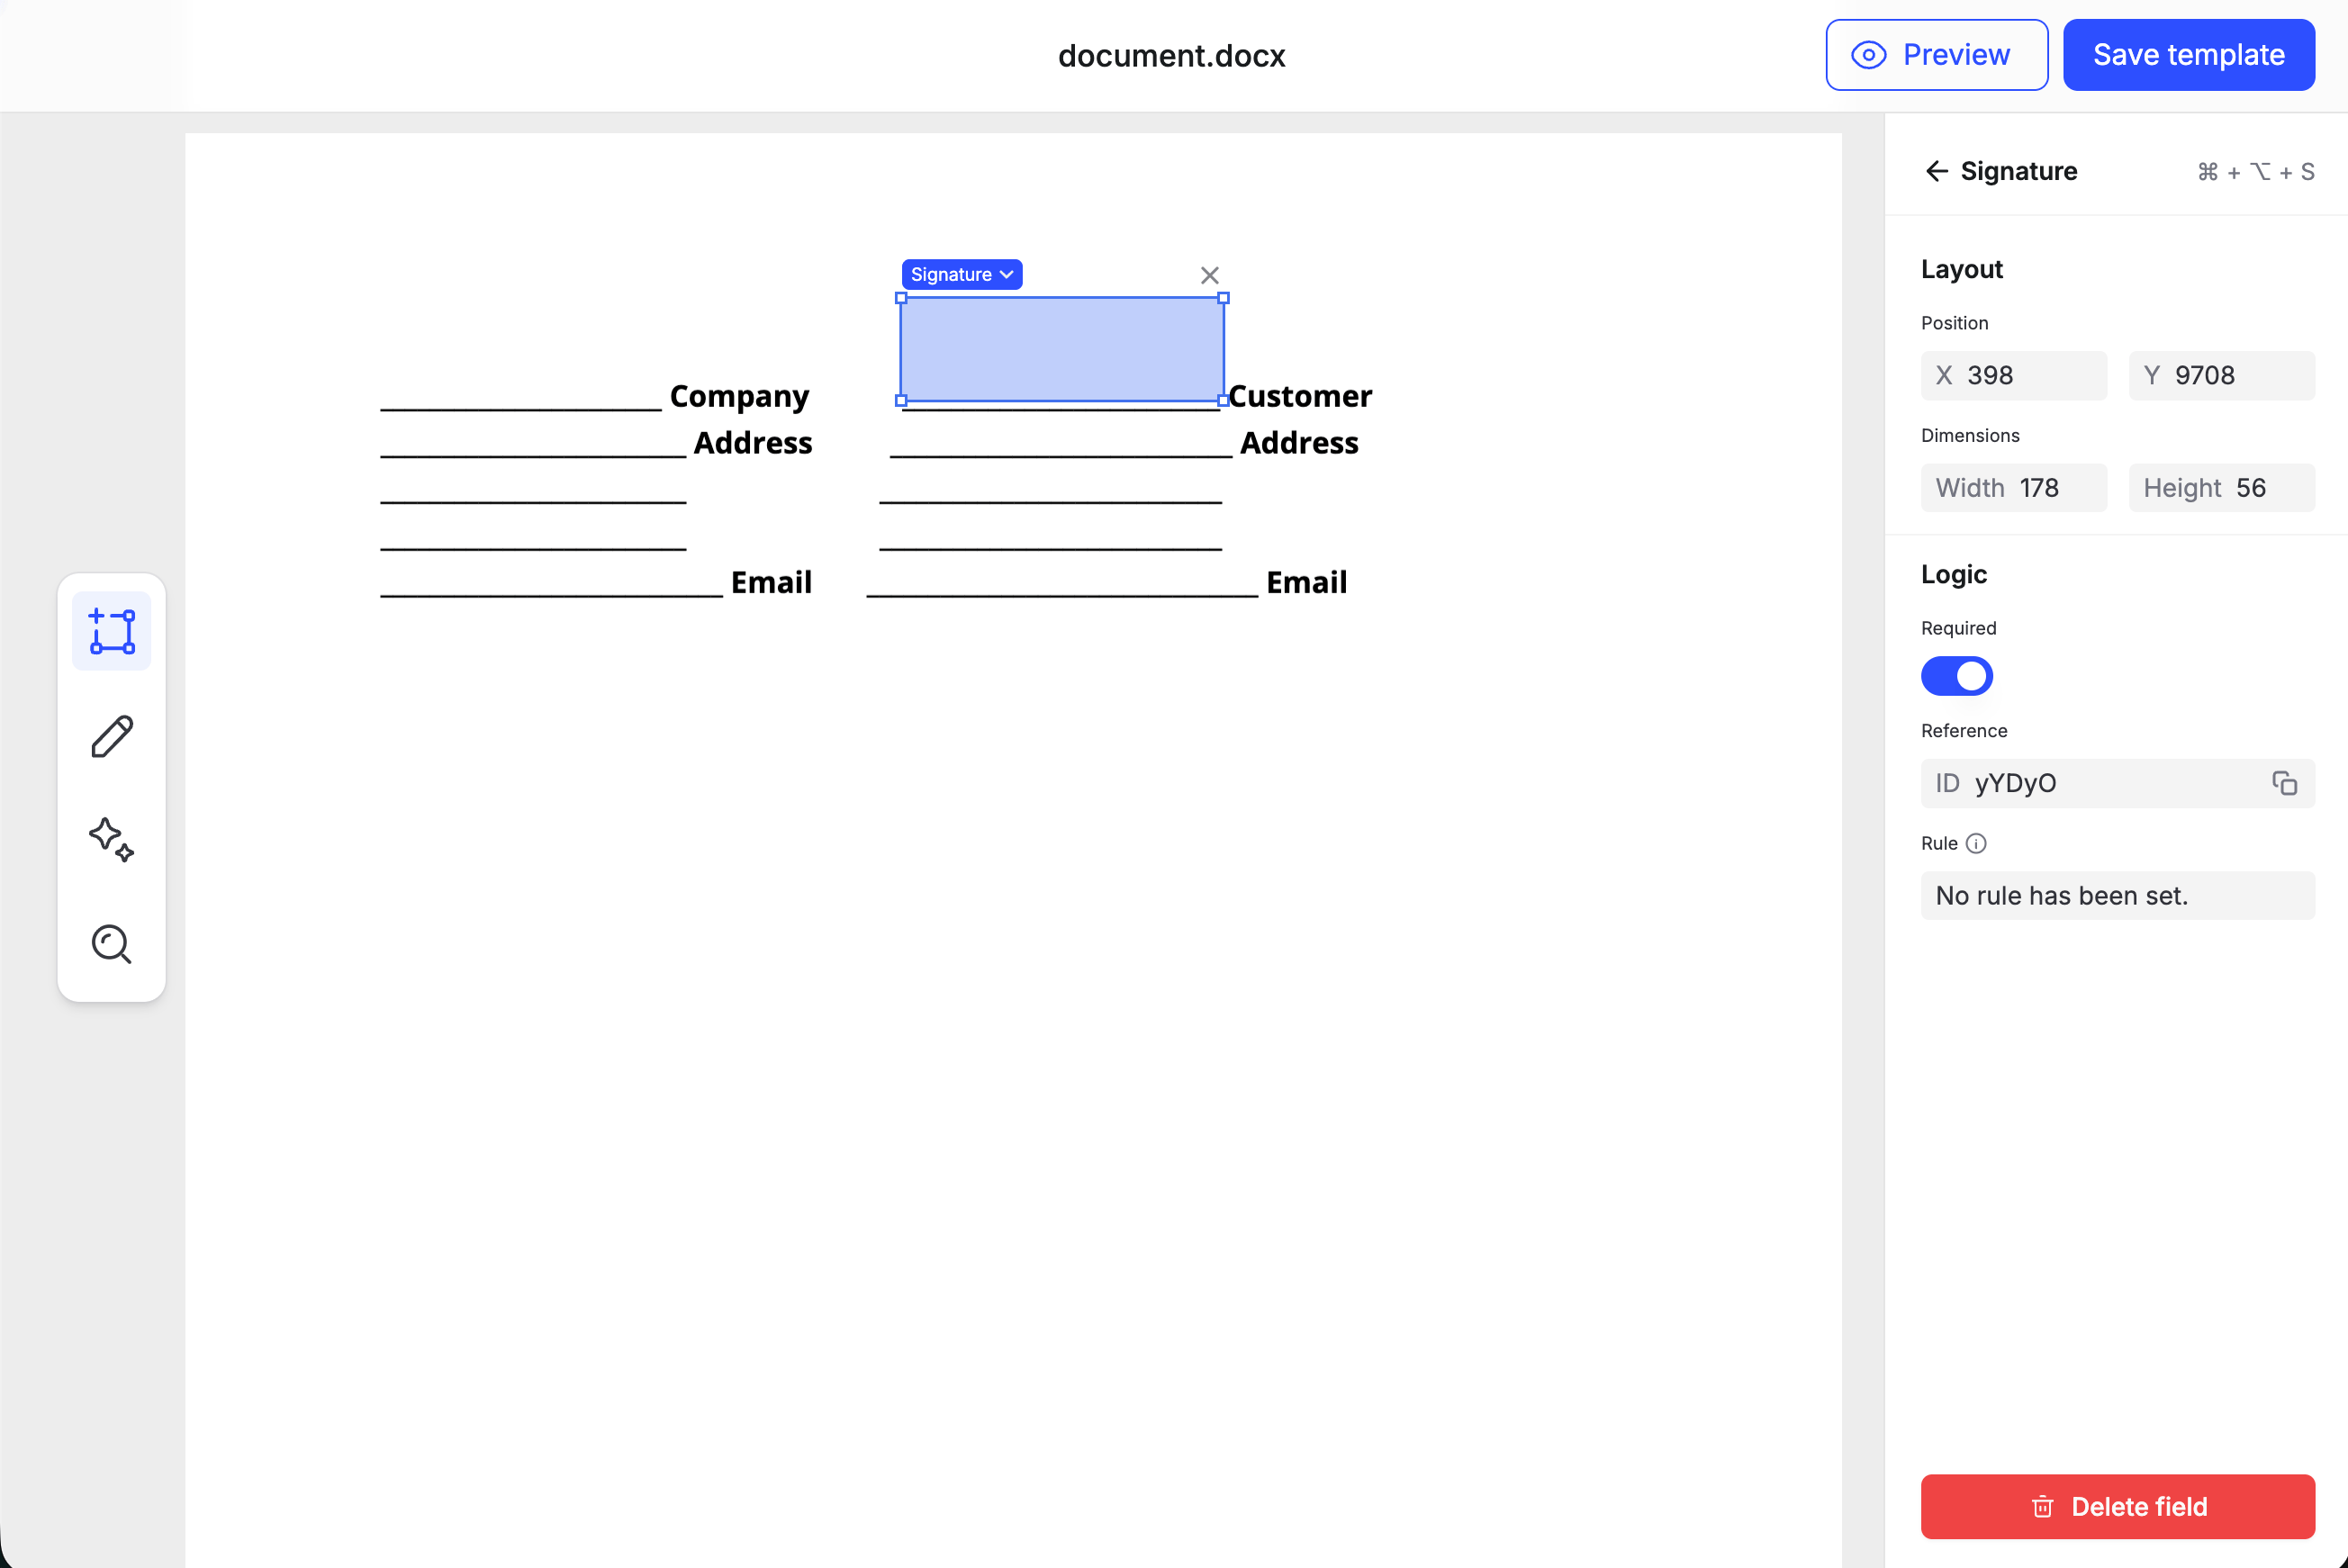
A Signature field selected on the document. Copy the Reference ID from the sidebar for prefills.
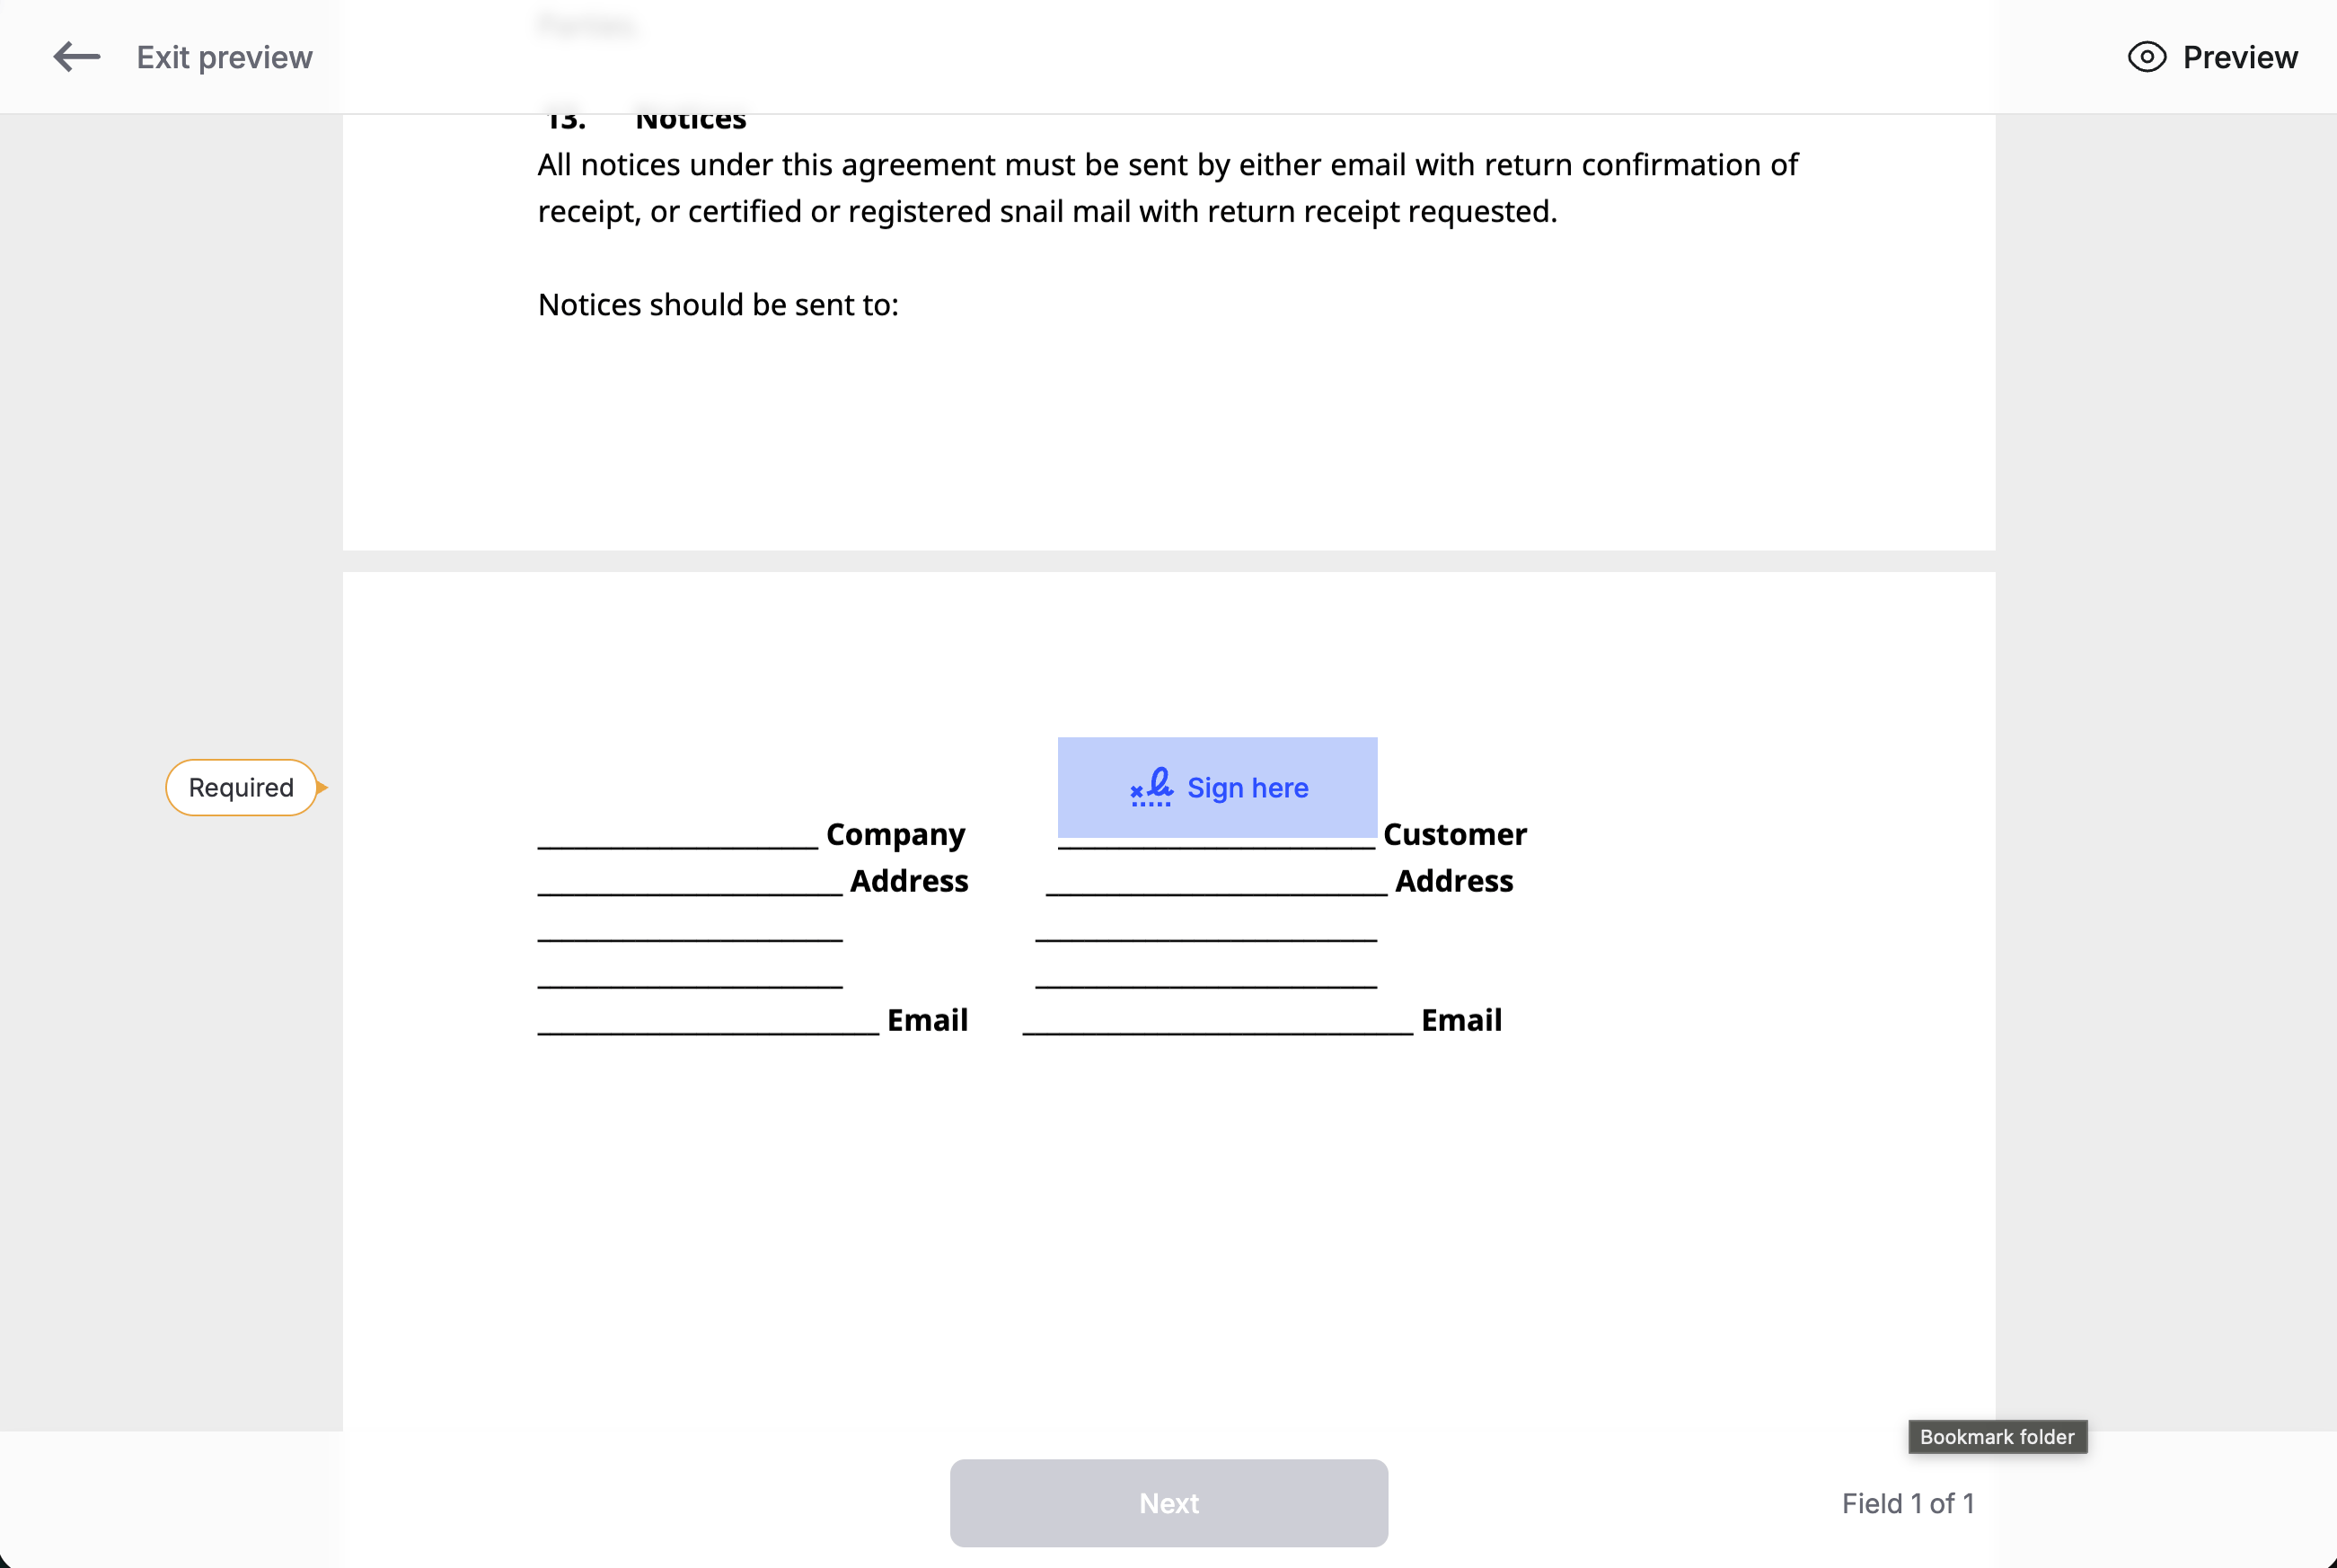
Preview mode highlights required fields and lets you step through them before saving.
onTemplateEditorSaved to the parent window, which you can process to close the iframe.
Next steps
Your template is ready for the signing API. Pass thetemplateId from this walkthrough into a signature request to collect signatures.
Embedded signing
Use this template with the signing API — create a signature request and embed the signing experience.
Redlining
Negotiate revisions on a DOCX template before signing.